Introducing VisioBot3000 – Part 1 (Clark Kent)

For a while now, I’ve been demonstrating Visio automation in PowerShell. For the most part, the posts have included a bunch of short code snippets designed to illustrate simple concepts.

Unfortunately, the code has been filled with “magic” constants, and lots of method calls on the various Visio COM objects. Both of those make code hard to read and write, the exact opposite of what you want as a PowerShell scripter. What’s the solution? PowerShell makes it easy to wrap complex code in cmdlets (or advanced functions, if you prefer) and expose a much simpler interface.

Background

When I started looking at driving Visio from PowerShell, I ran across the VisioAutomation project (originally here) by Saveen Reddy.  Contained in that project (which is much broader in scope than my interests) was a module called VisioPS that exposed several Visio concepts as PowerShell cmdlets.  I played with it some, and it worked.  That was exciting.  A major downside for me was that the module was a binary module, which meant writing cmdlets in C#.  That’s a great approach for the project, which is geared towards .NET languages in general, but it limits the attractiveness for PowerShell developers (or at least for me).   I ended up re-writing parts of the module in PowerShell and decided eventually to write my own module.  There are probably some naming artifacts left over from its origin as a “re-implementation” of VisioPS.  I wanted to make sure to give credit for getting me started down this road.

What is VisioBot3000?

To start with, VisioBot3000 implements cmdlets to help you draw Visio diagrams using the things that I’ve introduced over the last several posts:

  • Documents
  • Pages
  • Stencils
  • Masters
  • Shapes
  • Containers
  • Connectors

It also has some support (barely) for Layers.

Here’s a simple (annotated) example of using VisioBot3000.  It uses a custom stencil that I have on my system (and a stock stencil that I copied to c:\temp), but that’s not terribly important:

Import-Module VisioBot3000 -Force

#start Visio and create a new document
New-VisioApplication
New-VisioDocument C:\temp\TestVisioPrimitives.vsdx 

#tell Visio what Stencils I want to use and give them "nicknames"
Register-VisioStencil -Name Containers -Path C:\temp\MyContainers.vssx 
Register-VisioStencil -Name Servers -Path C:\temp\SERVER_U.vssx

#pick a master from one of those stencils and give it a nickname
Register-VisioShape -Name WebServer -From Servers -MasterName 'Web Server'
Register-VisioShape -Name DBServer -From Servers -MasterName 'Database Server'


#pick another master (this time a container) and give it a nickname
#note that this is a different cmdlet
Register-VisioContainer -Name Domain -From Containers -MasterName 'Domain'

#draw a container with two items in it
New-VisioContainer -shape (get-visioshape Domain) -name MyDomain -contents {
   New-VisioShape -master WebServer -name PrimaryServer -x 5 -y 5
   New-VisioShape -master DBServer -Name SQL01 -x 5 -y 7
}

#add a connector
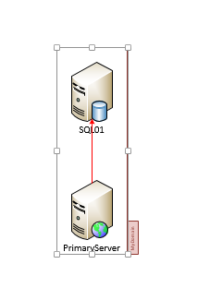
New-VisioConnector -from PrimaryServer -to SQL01 -name SQL -color Red -Arrow

That probably seems like a lot of code, but it’s a lot less than you’d have to write to draw the diagram. A lot of it is boilerplate code that you’d probably factor out into a “standard diagram stencils and masters script”. And look….the only “magic numbers” in the code are the x/y positions. Not super bad, in my opinion.

Here’s the output:
VisioBotPrimitives1

This code is a huge (yuge?) improvement over writing code against the bare COM objects. But it’s not even close to the best part of VisioBot3000.

Did you notice that the title said “Clark Kent”? Stay tuned until next time when VisioBot3000 takes of its glasses, so to speak, and the power is really revealed.

As usual, let me know what you think in the comments (or on Reddit, or Google+, or Twitter)

–Mike

P.S. VisioBot3000 lives on github here.
PowerShell and Visio Part 6 – Containers

Ok…I think this is the last of the “how to perform primitive operations in Visio” articles that I’m going to do.  Hope you’ve been enjoying them.  If you haven’t been keeping up, you can find them all here.

In this installment, I’m going to show you how to create a container in Visio.  Containers are really useful, because when you move them, you move the contents as well.  Along with connections, containers are probably the most important feature of Visio (at least for me).

Container Basics

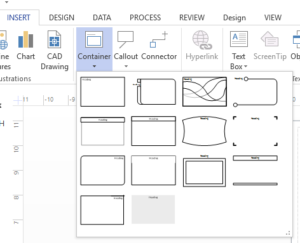
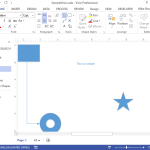
The first thing to know is that containers are special kinds of shapes, just like the ones we used when we were dropping shapes on the page.  So if you have containers in a stencil you’re using, then you can use those.  If you don’t have any special containers you can use the built-in container stencil that you see in Visio when you go to insert a container from the ribbon:

insertContainerStencil

To use the built-in stencil, though, you have to know where to find it. Fortunately, you can ask Visio where to find it. If you have a reference to Visio in a variable (we’ve been using $Visio), you do it something like this:

$stencilPath=$Visio.GetBuiltInStencilFile(2,0)

The 2 represents the constant visBuiltinStencilContainers, and 0 is visMSDefault, meaning to use the default measurement units. If you’ve been reading along, you have already seen a bunch of constants. There are tons more, and I’ll let you in on how I’m making them a bit easier to deal with in the next post.

Once we have that stencil path, we can use the OpenEx method on the Documents collection to open the stencil (hidden, of course):

$stencil=$Visio.Documents.OpenEx($stencilPath,64)

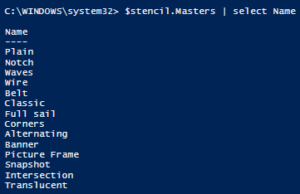
That stencil has a bunch of masters on it:
containerMasters

There are a couple of approaches to adding a container to a document:

  1. Drop the container as a shape, and then add shapes to it.
  2. Drop the container as a container, listing the shapes that are in it.

Dropping containers as shapes

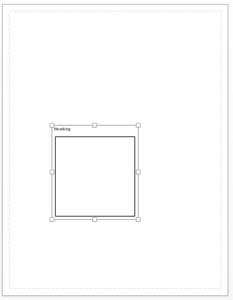
For the first option, you already know how to add a shape to a page using the Drop() method.

$page=$Visio.ActivePage
$container=$page.Drop($master,5,5)

droppedContainer

After you do that, you use the ContainerProperties property of the container (which is a special property other shapes don’t have), calling the AddMember() method to add shapes. You can also add Selection objects, but we haven’t talked about those.

Let’s draw a rectangle on the page (it’s quicker to show than a custom shape, but it works the same):

 $rec=$page.DrawRectangle(2,3,5,6)
 $container.ContainerProperties.AddMember($rec,1)

And we can see that the rectangle is inside the container. We passed a 1 to tell the container to resize to fit the shape we put in it. If you don’t do that, you will probably have shapes hanging over the edges of the container.

If you have more shapes you want in the container, you can add them as well by calling AddMember. Not very tricky.

The problem I have with this approach is that you have to know where to drop the container in the first place. Not a huge deal, but the less I have to know the better.

Dropping Containers around shapes

To use the second approach, you need to start by dropping the shapes that you want inside the container onto the page. Again, I’ll just drop a rectangle, but the idea is the same with any shapes. Once I’ve got the shape, I use the DropContainer method on the page to drop the new master shape (of the container) and tell it the shape I want it to contain.

 $rec=$page.DrawRectangle(2,3,5,6)
 $container=$page.DropContainer($master,$rec)

DropContainer_2

If you compare the output of the two approaches, you’ll see that the second give a “tighter” container, that is, since we didn’t tell Visio where to place the container, it calculated exactly how big it needed to be and where to put it.

Adding More Shapes

 
Now that you have a container you can loop through other shapes that need to be in it and use the ContainerProperties.AddMember method to add all of them (in a loop!). No need to bore you with the details. You’re sharp and can figure that out.

Let me know what you think

–Mike

P.S. If you want to add all of the shapes at once (with either method) you can use a Selection object. They’re not hard to use, but I wanted to keep this post focused on containers.

Thoughts on PowerShell Performance

Last night Rob Campbell (@mjolinor) and I were talking after his presentation on performance when using Get-Content with -ReadCount and different string matching techniques and I realized it’s time to verbalize my thoughts on performance in PowerShell.

Part 1 – It doesn’t matter

When people ask me if PowerShell is fast, my first response is usually either “It doesn’t matter” or “I don’t care”.  It’s not so much that I don’t care about it being fast (I kind of do) or that it isn’t fast (it is), but that when writing PowerShell solutions the primary goal in my mind should always be operator efficiency.  That is, does this make my life as a PowerShell user easier.  The main points for me are:

  • Consistency (does it always do the same thing)
  • Repeatability (is this something I can use over and over)
  • Accountability (does this log, audit, warn, etc.)
  • Maintainability (will I be able to change the code easily if I need to)

Part 2 – It sometimes does matter

With the understanding that the main thing (part 1) is covered, the truth is that sometimes performance does matter.  If you’re processing a single file with a dozen lines in it, it would be hard to have a solution that wasn’t acceptable performance-wise.  Dealing with a directory full of multi-gigabyte files presents a different challenge.

When you’re dealing with a huge volume of data, or operating under time constraints (near real-time alerts, for instance) it’s possible that you might want to think about optimizing your code.  In these instances, considerations like what @mjolinor was talking about (e.g. using read-count to speed things up, using -replace on arrays rather than single strings) make perfect sense.

Part 3 – the problem might not be what you think it is

When dealing with performance, it’s easy to try to squeeze a few milliseconds out of an operation.  If the operation is happening millions (billions?) of times, that will definitely have a measurable effect.  Often though, even more substantial gains can be found by changing to a more efficient agorithm.

As a (trivial) example, you could spend a lot of time trying to optimize the statements in a bubble-sort routine.  (sidebar…does anyone actually write sort routines anymore?)  You could conceivably double or triple the speed of the routine, but when dealing with a large dataset, you’d still be better off with a better sorting algorithm.

Part 4 – The moral of the story

Don’t stop investigating different approaches to see what’s faster.

Don’t just use “technique X” because it’s the fastest performing.  Consider code readability, and maintainability along with things like how often the code is run.  No point in optimizing a process that only runs once and takes 10 minutes.  Who cares if it ran in 3 minutes instead?  You probably spent more than 7 minutes “optimizing” the code.

PowerShell optimizes the user, not the code.  Make sure when you spend time making the code fast, you haven’t made the user slow.

Feel free to disagree in the comments!

–Mike

Fun at MidMo PowerShell User Group

Had a blast at the MidMo PowerShell user group meeting last night in Columbia,MO. It was just the second meeting for this group and there were over a dozen people present.

I started with a presentation on using PowerShell and Visio together (some of which you’ve seen here) and Rob Campbell (@Mjolinor) finished the meeting up with a discussion of performance using Get-Content with -ReadCount and also comparing different techniques to match lines in a huge file.

The group was really relaxed and engaged throughout both presentations.

Looking forward to more and more Missouri PowerShell user groups!

STL PSUG meeting coming up on 4/21!

–Mike

PowerShell User Group Fun!

I love local user groups.

I’ve been an off-and-on attender of the SQL Server user group and the .NET user group in my area.  Neither of these really are about what I do, but it’s been fun to connect with local people about technology.  I did speak about PowerShell (embedding in C# apps) once, too.  Until recently there hasn’t been a PowerShell-specific user group anywhere close,though.

That all changed at the beginning of the year. First, the St. Louis PowerShell User Group started meeting. I missed the first meeting (in January) but was able to attend in February and March.

I was honored to be a speaker at the March 17th meeting, presenting some of my recent work (which you may have been reading about here) on automating Visio with PowerShell.

Josh Castillo (@DoesItScript) also spoke that night about using Git with PowerShell. His talk, combined with the very positive feedback I received from my talk spurred me on to getting my Visio work up on GitHub and also to using Git at the command-line to manage updating it. It’s been fun so far, and I’ve learned a lot. I’m thinking that Josh might have had a big impact on how I work from now on.

Interestingly, though, another user group started up in Missouri on March 17 as well. This one, the MidMo PowerShell User Group met for the first time in Columbia, MO. The two groups are communicating so that they don’t schedule on top of each other in the future.

I’m super-excited about these groups and plan to attend them as often as I can. Both of these are around a three-hour drive for me, however, so I’m thinking seriously about starting a Southwest Missouri PowerShell User Group (SWMOPUG) in Springfield sometime soon. If you’re close by, let me know and we can talk about what I’m planning.

Here’s the picture from Josh’s tweet about my session:
STLPSUG_160317


He called me a “PowerShell guru” so that’s fun.  🙂

How are you sharing your PowerShell?  Blogging?  Teaching?  Contributing to projects?

Get involved.  You’ll have a lot of fun and help others at the same time.

Just my thoughts.

–Mike

PowerShell Code Review Guidelines

I get asked to look at other people’s PowerShell code a lot at work, and I really enjoy it.  I also find myself looking at my “old” code from several years ago (back to 2007!) and think…there’s a lot of work to be done.

To that end, I’ve compiled a list of “PowerShell code review guidelines” to help keep the ideas flowing.

Before I show them, though, I have some ground rules to share.  BTW…I use function, script, and code somewhat interchangably, so please don’t get confused by that.

  1. The most important thing is whether the script solves the problem at hand.  In my book, if it does that, the rest is extra.
  2. Remember that everyone is at a different place in the “path to true PowerShell enlightenment”.  Don’t beat people over the head because they’re not using DSC, or Remoting, or Workflows, or whatever your favorite thing is.  That doesn’t mean you don’t mention those options, but the focus should be on the code in front of you.
  3. You can’t and shouldn’t try to solve all of the problems at once.  This goes right along with #2 above.  If the script is full of Write-Host output, and uses Read-Host in loops to validate parameters, you probably should deal with those and not worry so much that they haven’t used a lot of pipelines.

In my mind, a code review is an opportunity to help a scripter use best practices more consistently.  It is an opportunity to help them write more flexible, more maintainable, and more reliable code.

Most importantly, it’s not a humiliation session in how much better you are at PowerShell.  If you use them in this way, don’t be surprised if you don’t get a lot of return customers.

General

  1. Does the function or script accomplish the intended task?
  2. Is there any comment-based help including examples?
  3. Is the function or script “advanced” using [CmdletBinding()]?
  4. Are risk mitigation parameters supported if appropriate?
  5. Does the code use aliases for cmdlets?
  6. Does the script or function follow the Verb-Noun Convention?
  7. Is the verb in the approved list?
  8. Is it the correct verb?
  9. Are the noun(s) consistent?
  10. Is the function or script in a module with a discoverable name?
  11. Parameters

  12. Do the Parameters have specified types?
  13. Are the parameters named appropriately?
  14. Are parameters set as mandatory when appropriate?
  15. Is any declarative parameter validation used?
  16. Are arrays allowed when appropriate?
  17. Is pipeline input allowed and implemented properly?
  18. Are switch parameters used to flag options?
  19. Do parameters have appropriate default values?
  20. Are “use cases” divided into ParameterSets?
  21. Are named parameters used instead of positional parameters?
  22. Output

  23. Is the output in the form of objects?
  24. Is output produced in the PROCESS block if possible?
  25. Are format cmdlets used?
  26. Is write-verbose used to supply user-directed output messages?
  27. Is write-warning or write-error used for problem messages?
  28. Is write-debug used for developer-directed output messages?
  29. Flow

  30. Are filtering operations as far to the left in pipelines as possible?
  31. Are pipelines used appropriately in place of sequential logic?
  32. Are pipelines overly used (extremely long pipelines?)
  33. Comments

  34. Are comments used to explain logic (and not statements)?
  35. Is commented-out code present?
  36. Error Handling

  37. Are try/catch/finally used for terminating errors?
  38. Are errors signaled with write-error?
  39. Are terminating errors forced with –ErrorAction STOP?
  40. Are console apps checked using $LastExitCode
  41. Do write-error calls use the -TargetObject parameter?

Let me know what you think.

Should have it posted to github for revisions tomorrow sometime.

–Mike

PowerShell And Visio Part 5 – Connections (updated)

It’s been a while since the last post.  I decided that if I had to chose between writing PowerShell and writing about PowerShell, I should favor the former.

In this episode, I’ll talk about how to create connections between objects in a Visio diagram.  Turns out it’s not really that hard (just like most things with Visio so far), but there some interesting things we can do with the connections once they exist.

So, to start with, let’s get a some shapes on a page.  If this doesn’t look familiar, refer back to the earlier posts in this series here:


$visio=New-Object -ComObject Visio.Application
$Document=$Visio.Documents.Add('')
$rect1=$Visio.ActivePage.DrawRectangle(1,1,2,2)
$rect2=$Visio.ActivePage.DrawRectangle(4,4,5,5)

Here’s what that got us:
2Rectangles

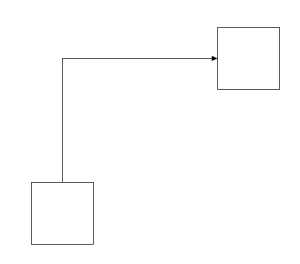
Now, we have 2 shapes ($rect1 and $rect2). To connect them, we’ll use the AutoConnect() method on one of the 2 shapes. Since Visio connectors are directional (that is, they have a start and an end), it matters which one we use.

$rect1.AutoConnect($rect2,0)

The AutoConnect() method takes three arguments:

  1. The shape you want to connect to
  2. The direction (relative to the first shape) you want to move the connected shape to (0 means don’t move the second shape)
  3. The shape you want to use as a connector

In this example, we chose to not move the second shape, and used the default connector.

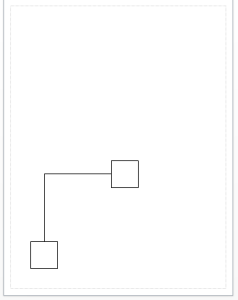
The result looks like this:
ConnectedRectangles

There are several interesting things about this connector:

  1. It doesn’t indicate direction (you can’t tell which way the connector goes)
  2. It’s dynamic (it will move/route as you move the two shapes)
  3. We didn’t get a reference to it as a result of the AutoConnect() method

We’ll start by addressing the last point. Since we didn’t get a reference to the connector, how can we find it? It turns out that just about everything in Visio is a shape, so we can look at the Shapes collection on the page:

$Visio.ActivePage.Shapes | Select-Object Name

In the output, you will see (at the end) a shape called “Dynamic connector”. That’s our new connector (duh).

$connector = $Visio.ActivePage.Shapes['Dynamic connector'] | select -Last 1

I picked the last one in the collection in case there were others. Visio adds to this collection as shapes are added to the list, so this should be safe.

Now that we’ve got a reference to the connector, how can we designate which end is which? In the Visio GUI, we would click the Line drop-down on the ribbon and select the arrows (or dots) that we wanted. In PowerShell, it’s a different story altogether.

First of all, there’s not an Arrows property that we can use. That would be too easy. It turns out that in Visio, everything has what’s called a ShapeSheet, which is kind of like a bunch of little spreadsheets that control every aspect of how the object behaves in Visio. Accessing cells in the ShapeSheet can be done several ways, but typically you either use the Section, Row, Column reference (SRC) or a special Named Cell. These references look something like this:

$Shape.CellsSRC($section,$row,$column) 

and

$Shape.Cells('CellName')

To set the ending arrow for a connector, there’s a “named cell” called EndArrow which tells Visio what symbol to draw at the end of the connector. We’re going to set the cell to 4. The number can apparently be anywhere from 1-45 to display different arrows.

$connector.Cells('EndArrow')=4

And the resulting arrow (zoomed in so you can see it):
Arrow

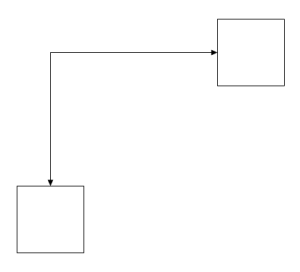
If we wanted the arrow to be bi-directional, we could also set the “BeginArrow” cell.

$connector.Cells('BeginArrow')=4

BeginArrow

Ok. Now for #2. Can we change how the connector routes? I often like to use straight lines because they’re easier to follow. Change the connector to be straight, we have to resort to the ShapeSheet again. However, there’s no named cell this time (see P.S…I found names). Now, we have to know the SRC to where the cell is. In fact, for this there are 2 cells that we have to set, so we need to know both SRCs.

 $connector.CellsSRC(1,23,10) = 16
 $connector.CellsSRC(1,23,19) = 1 

That’s pretty cryptic, right? Absolutely. It turns out with Visio, there are about 40 bajillion different constants to use. This link will help you with some, but they aren’t organized much. This page is organized a little better, but it’s still hard to know where to look. The constants in this example are:

  • visSectionObject = 1
  • visRowShapeLayout = 23
  • visSLORouteStyle = 10
  • visLORouteCenterToCenter = 16
  • visSLOLineRouteExt = 19
  • visLORouteExtStraight = 1

So that’s a mess (at least to me). How in the world do we figure these out? The easiest way is to record a macro and do what you want to find out about, then look at the VBA. The VBA code for setting a connector to a straight line looks like this:

Application.ActiveWindow.Page.Shapes.ItemFromID(3).CellsSRC(visSectionObject, visRowShapeLayout, visSLOLineRouteExt).FormulaU = "1"
Application.ActiveWindow.Page.Shapes.ItemFromID(3).CellsSRC(visSectionObject, visRowShapeLayout, visSLORouteStyle).FormulaU = "16"

That, with some googling, can get you what you need. I’m working on a better solution, but it’s not ready quite yet. 🙂

That’s enough about connectors.

Let me know what you think in the comments (or on Twitter)

Mike
@MikeShepard70

P.S. Found the “named cells” for making straight lines: ShapeRouteStyle and ConLineRouteExt.

PowerShell and Visio – Part 4 (Interlude)

Why mess with Visio from PowerShell?

I’ve got a couple of posts with some really basic code to access things in PowerShell and it occurred to me…I probably haven’t made it clear why you might want to do this (other than that you can).

So, instead of moving on to connections (which will be next, followed by containers), I thought I’d take a break and show you a really quick and practical script.

The Scenario

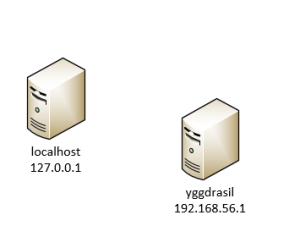
Imagine that you just got handed a network diagram of a bunch (dozens?) of servers that you manage.  The only problem is, the diagram only includes the server name.  Your boss needs it to include the IP Addresses for each item.  You have a choice.  You can either manually look up each name with Resolve-DNSName and copy-and-paste the IP Address into the diagram, or you can use PowerShell to solve the problem.

Here’s the script.  The funny part (to me, at least) is that the complexity is trying to get the IPV4 address out of Resolve-DNSName, the Visio part is simple.


$Visio = New-Object -ComObject Visio.Application
$Doc=$Visio.Documents.Open('c:\temp\ServerDiagram.vsdx')
$Page=$Visio.ActivePage

foreach($shape in $page.Shapes){
    if(!$shape.Text.Contains("`n")){
        $address=Resolve-DnsName $shape.text 
        $address=$address| where-object {$_.IP4Address } | select-object -First 1
        $newLabel="{0}`n{1}" -f $shape.text,$address.IP4Address
        $Shape.Text=$newLabel
    }
}

All it does is look for shapes on the page that don’t contain newlines, and update those shapes with the IP Address it wrestles out of Resolve-DNSName.

Here’s “before”
ServersBefore

And “after”
ServersAfter

I think you can see that something like this is a handy tool to have in your back pocket. I know that when I draw server diagrams I don’t label the IP Addresses manually anymore. This script (or one just like it) has saved me hours.

And that, my friend, is what PowerShell is all about.

–Mike

PowerShell and Visio Part 3 – Drawing Shapes

This is part 3…if you haven’t read part 1 or part 2 you probably want to go back and read those.

Now that we’re all up to speed, I promised I’d talk about drawing shapes in Visio.

We’ll start with an easy one.

Drawing Circles and Rectangles

Remember that you have to open Visio with PowerShell in order to access it from a script.

$Visio= New-Object -ComObject Visio.Application

We can open a new (blank) document using the same technique we saw last time to open a document, except we will pass an empty string:

$Doc=$Visio.Documents.Add('')

Now, we can get a reference to the active (only) page in the document by accessing the ActivePage property of $Visio.  We could also have looked at the Pages collection on $Doc and referenced it either by ID (1) or name (Page-1)

$Page=$Visio.ActivePage
#Or
#$Page=$Doc.Pages(1)
#$Page=$Doc.Pages('Page-1')

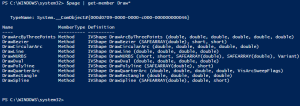
Now that we’ve got a page, let’s see what Draw methods we have:

$Page | get-member Draw*

Draw methods
DrawOval and DrawRectangle sound pretty straightforward.  Let’s try them:

$Page.DrawRectangle(1,1,5,5)
$Page.DrawOval(6,6,8,8)

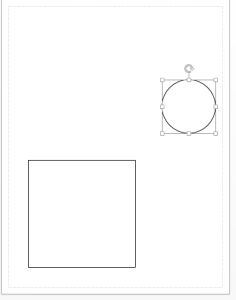
Here’s what it looks like in Visio (note that my diagrams are using US measurements, so the numbers correspond to inches):

Visio_Rect_Circle

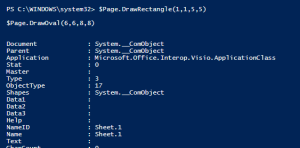
The functions also returned the objects that were drawn to the console (which we could have saved in variables if we were paying attention).
Visio_Rect_Circle_Objects

Drawing Shapes

Notice that there weren’t any methods for drawing shapes, which is what you really want to do in Visio. Shapes in Visio are stored in what Visio calls stencils, and are typically separate files. To open a stencil and not show it in Visio you can use the OpenEx method of the application object (which we are calling $Visio) and pass the filename and the constant 64 (which means “open hidden”). Here, I’m opening a stencil which contains a bunch of shapes for different kinds of servers. The _U at the end of the filename means that it uses US measurements rather than metric.

$stencilPath='C:\Program Files (x86)\Microsoft Office\Office15\Visio Content\1033\SERVER_U.VSSX'
$stencil=$Visio.Documents.OpenEx($stencilPath,64)

I’ve stored the loaded stencil in a variable because we want to work with it.

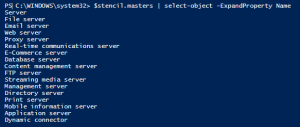
The shapes in the stencil are stored in a collection called Masters.
Masters

Let’s put an FTP Server somewhere on the page:

$Master=$stencil.Masters('FTP Server')
$Page.Drop($Master,4,4)

DropppedMaster
And here’s the output:
FTP_Server

That’s enough for today. Next time we’ll think about connecting objects together.

Let me know what you think in the comments!

–Mike

PowerShell and Visio Part 2 – First Steps

Last time I talked about Visio and PowerShell and told you (in broad strokes) what I wanted to get done.  Now we’ll actually get started!

Starting Visio from PowerShell

To open the Visio application from PowerShell in order to start manipulating it, you need to use the appropriate COM class.  The code looks like this:

New-Object -ComObject Visio.Application

The New-Object cmdlet returns a reference to the new instance of Visio that’s running.  If you ran that line by itself, you’d see a bunch of properties of the new Visio.Application object and you’d see that Visio started, but without putting the object in a variable you’d be kind of stuck.  So…

$Visio=New-Object -ComObject Visio.Application

Now, we can use that reference to do fun stuff.

Opening a Visio Document

To open an existing document, use the Add method of the Documents property (a collection) of the $Visio object.  Just like the last time, this outputs an object that we’ll want to capture.  For example, opening the Visio diagram stored in c:\temp\SampleVisio.vsdx you’d do this:

$doc=$Visio.Documents.Add(‘c:\temp\SampleVisio.vsdx’)

sampleVisio

Documents are made of pages:

$doc.Pages | select-object –property Name

This document only has one page, named (by default) ‘Page-1’.  We can either refer to it by name ($doc.Pages(‘Page-1’) or by number ($doc.Pages(1)).

$page=$doc.Pages(1)

Once we’ve got the page, we can see the shapes that are found on the page:

$page.Shapes | select-object –Property Name,Text

shapes

Visio objects are interesting to work with, and the properties you want might be hard to find, but they’re probably there.  For instance, to find the location (in the current unit of the document) of a shape you have to do this:

$x=$shape.Cells(‘PinX’).ResultIU 
$y=$shape.Cells(‘PinY’).ResultIU

That should get you started looking at Visio with PowerShell. In the next post we’ll work on dropping shapes on the page and connecting them.

A reference that will help immensely is the VBA Object model reference for Visio found here.

Let me know if you have questions about this.

–Mike